Showing posts with label tutorial. Show all posts

Gaga Part 2!

Posted by mickung
Here it is, the second part of my Gaga dress up!
gaga 2 121_pp
This looks was inspired by the ‘Sandwich’ scene in the Telephone video
article-1268390960325-08B06276000005DC-87891_466x310 1 gaga part2
How I did the eyes –
  • I primed my eyelids with UDPP, and stuck some selotape along the outer corner of my eye towards the end of my eyebrow
  • I then wet an eyeshadow brush and created a paste/creamy eye shadow with The Body Shops shimmer cubes 19, shade 04 sparkling sky and placed it all over my lid up to the crease – like so
  • gaga 2 064 (yes, the only tape in my room was decorated in leopard print!)
  • I then picked up a blender brush and blended black eyeshadow (MACs Beauty Marked) in the crease of my eye and up outwards.
  • Then I lined my water lines with black kohl, and a little of the blue paste, and smudged some kohl onto my lower lash line.
  • I then placed a shimmery gold eyeshadow (MAC’s Nylon) onto my brow bone and in the inner corner of my eye for definition.
  • Filled my brows in and added mascara!
It took about 25 mins to do the whole look which was quite speedy for a look I’ve never practised before!  The look lasted the 6 hours until I got home from work completely, it didn’t smudge at all – that’s why UDPP is my holy grail primer.
 gaga 2 138_pp
I decided not to wear any false lashes this time as I wanted the blue to stand out, and I didn’t want my eyes to feel heavy again through work, but if I was dressing up properly I would have worn them!  The lipstick I used was TBS #59 which is a gorgeous neon pink, and I used my favourite blusher of the moment, TBS #12 Apricot Shimmer.
Hope you girlies liked this one as much as the last! They are both very opposite looks but so fun to do! Let me know what you think!
& Don’t forget to enter my giveaway if you haven't already (The Link is here!!) I’m giving away some cute Body Shop and Gosh beauty products, and the entry closing date is next Thursday! XXX

Gaga Part 1!

Posted by mickung
Hey girlies!  Today at work, it was ‘Gaga’ Day, and we had to dress up like the goddess herself!  I thought I would pop up some pictures of how I wore my make-up for my shift!
gaga 062_pp
My look based based on and inspired by her opening look in the prison sequence in her music video for Telephone
Picture 19
It took me very long time to do, I’m not quite sure why, it was just getting the shape of her eye shadow in the crease of my eye which was difficult, but I think I got there finally!
gaga 026
gaga 017
If anyone wants to know how I did this I -
  • Primed my eyelids, then used a white eyeshadow all over my lids, up to the brow bone.
  • I then used a combination of brown eyeshadows and blended it into the crease of my eye, following the natural curve of my eyebrow.  I also blended it down to the inside corner of my eye and a tad down my nose bone to give extra definition.
  • I then lined my top and bottom lashes with a liquid liner, and extended the flick out
  • I applied the biggest eyelashes I could find!
  • Oh, and then I filled my brows in big time! First with a brown pencil liner, then with a black pencil to give more of an arch.
On to the lips -
gaga 064_pp
  • I lined my lips in black kohl eye liner
  • Then applied a red lipstick
  • And then blended them both together with a lipstick brush! Easy Peasy!
This is me at work -
gaga 084 gaga 072_pp
My mummy helped do my hair – She made two small plaits either side of my head, and pinned them together at the top of my head with a pink bow – just to add some crazyhairness.
What does everyone think of my attempt?  I did feel a tad self conscious out and about at first, but I got used to it.  The eyelashes were so heavy though, I ended up taking them off three hours into my shift! I have to dress up again as Gaga on Saturday and I’m going to do a completley different Gaga look for then, which of course I’ll take pictures off!! XX

I am normally pretty boring with my hair; I always wear it down because its pretty long and it gets kinky if I wear it up. However recently I’ve been wanting to be more adventurous with my hair – I’ve been wearing plaits and high buns and pony tails and I’ve enjoyed wearing my hair differently.  So I’ve filmed two, yes two, short ‘how to’ hair tutorials!

hairyoutube

The first is a fishtail side plait which is very ‘in’ at the moment.  Its super easy to do but does take some practise.  I hope I’m understandable in this video – I had to film it a few times and was getting aggy at myself for it not looking right!

The second film below shows you how to do two buns (neat and messy), with the Goody Simple Styles ‘Spin Pins’ which you can see a review of here.  Many of you asked to see how they actually work and how to actually use them so I hope this short video helps!  (Please ignore my under-eye bags in this video!)

I hope you enjoy these films!  I’ve quite enjoyed doing hair tutorials so if you give me some ideas of more then I’ll be more than happy to give it a try.  And if you try any of these looks yourself  then do let me know/show me a photograph, I’d love to see :D

What’s your favourite hairstyle to do?  Tempted to get the spin pins now?

XX


Smokey Brown Tutorial!

Posted by mickung

I’ve had a few requests to do a tutorial of how I did my makeup in the header of my blog, and I decided to film it for you guys! 

3 

CLICK HERE to watch the video!

A few pictures of the look!

2

35

It took quite a few attempts to do this right in front of a camera but I finally did it and I hope it is what you expected of me!  I’m back in Essex at the moment so I don’t have my video camera with me, but as soon as I’m back in London I’ll film another tutorial. 

Let me know what you think of the video and if you have any ‘look’ requests then let me know!!

XX


What's more glamorous, daring and stare inducing than a pair of stunning red lips? Not much!  Christmas is fast approaching and its become my favourite time of the year to wear red lips, its festive and mature for the seasonal parties.  I think anyone can pull red lips off, although the ‘type’ of red may vary for each person because of skintone and what suits you more.  I personally prefer red lipsticks with a more orange, yellow base, rather than blue based red lipsticks as I feel they brighten my pale skin up.

To create the perfect red lips from scratch you will need -

 IMG_0088

A lip scrub - The Body Shop’s Lipscuff, Lipbalm - The Body Shop’s Shea balm, Red Lipliner - Prestige Lip liner in Tomango, Red Lipstick - Unknown brand Lipstick!

BARE LIPS (ugly!)

IMG_0135

STEP 1

IMG_0146

Apply a lip scrub or scuff to remove all the dead, dry, flaky skin that can completely ruin this look.  I use The Body Shops Lipscuff.  I adore this product, the fact that you apply it like a lipstick and then just rub your lips together to exfoliate.  This product has a minty taste and fragrance which is very pleasant and has small grains which help to gently remove the dead skin.  Also has marula oil in which is very moisturizing. 

Sorry for the unattractive photograph, but I wanted to show what the scrub looks like!

STEP 2

IMG_0159

Moisturize!  Apply your favourite lipbalm!  I use The Body Shop’s Shea Butter Lipbalm, its the most moisturizing balm I have ever come across and leaves my lips feeling juicy and soft.  The smell and taste is subtle but delicious and it doesn’t leave any residue or colour which is perfect.  These only come in a set of two at TBS stores and the proceeds go to charity.  If you are left with greasy lips, just pat off the residue with a tissue.

STEP 3

1

Line the lips.  I only have one red lip liner and I use it with all of my red lipsticks.  Its by Prestige in the colour Tomango.  Gently trace the outline of your lips with the pencil.  Pay special attention to the cupids bow.  A little trick I learnt at the MAC event last month is to look down when focusing on the cupids bow, because looking at them from above in a mirror, allows you to easily see if they’re even.  After lips are lined, I always fill in my whole lips as it creates a nice base for the lipstick to hold onto.

STEP 4

  IMG_0194

Apply your lippie!  I’m using one of my Mothers, I have no idea who its by but I love the colour (named Red Stiletto), its a perfect classic red shade.  (Before I run out of this I will take it into the shops to find another red lippie that matches the colour exactly). Blot the lips on a tissue after and add another thin layer, this will ensure that your lipstick lasts longer.

STEP 5 - EXTRA BONUS TIP!

IMG_0198 

Using your concealer, go around the outside of your lips just to make sure its all even and that there aren't any red smudges anywhere.  Your concealer will also emphasize your lips and the whole thing will just look neater!  Please note that in the photograph above, I hadn’t yet blended in the concealer so it looks messy!

ET VOILA!  (queue cheesy-catalogue-laughter-shots)

IMG_0208 

You are left with delicious red sultry lips.  Its up to you how you wear the rest of your makeup with your bright lips, many people say its a sin to wear dark, smokey eyes with red lips but I completely disagree.  I feel comfortable and pretty with smokey eyes so I will mix both looks.  I find that a brown smokey eye looks best with red lipstick on me.

IMG_0236_pp IMG_0241_pp

So be bright and brave when it comes to red lips, they look glam and sexy so wear them proud and be confident.

Was this helpful at all? What's your favourite red lipstick & do you have any bonus tips of your own?

XXX


Tutorial – Easy Smokey Eyes!

Posted by mickung

Today I will talk you through my ‘signature’ smokey black look.  I wear this look almost everyday I’ll admit that I feel naked without it!  I wore this look to the Edward Bess launch last week and had some compliments on it and a few of the girlies wanted to know how I did it and persuaded me to do a tutorial, so here it is!

1 

I’ve created diagrams showing the 6 steps I use to complete this look so hopefully it’ll be easy to follow at home.

tutoral2 

1. Start by applying primer to a clean eye, I use Urban Decay’s Primer potion.

2. Apply a light base colour.  I use MACs Nylon, it is my favourite base colour as it suits every other colour, it goes with browns, greens, blue etc.  Its a beautiful shimmery golden as you can see in the pics above!

3. Then apply a darker shade in the crease of your eye and create a ‘<’ shape on the outer edge of your eye to open it up.  Here I’ve used The Body Shops eye shadow in #42.  Again, use any colour, I normally use MACs Beauty Marked.

4. Apply a liquid or gel liner to your top lash line, you can make this thick or thin as you like and you can draw on a cat flick as well to give the illusion of longer eyelashes and larger eyes.

5.  Apply a black kohl pencil onto your lower lash line and waterline.  I use Gosh’s velvet touch kohl, its super smooth, lasts all day and is very affordable.  This line doesn’t need to be neat at all – I often use a smudger brush (from TBS) to smudge this line to make it more smokey. 

6.  Apply mascara to top and bottom lashes, I’ve used TBS’ super volume mascara.  Last but not least, apply a tab of your shimmery base colour on the inside of your eye socket, to open your eyes up and to brighten them!

And Voila!

voila

This look takes me literally 5 minutes as I’m so used to doing it, but when I’m going out in the evening I like to add more different shades and colours to build the look up!

IMG_0123_pp

Finish with your favourite blusher and a sweep of lipstick.  Here I used TBS blush in 05 Tea Rose and MAC’s Porcelain pink, with a slick of Jazzed lippie!  (Sorry for the bad hair – I’ve been so lazy and haven’t brushed it today – ew! Haha!)

Products used on eyes -

IMG_0085 IMG_0087

Products used on face -

IMG_0090

Did you enjoy this? Would you like to see more tutorials in the future?

If anyone tries this look out, show me a picture and let me know if it was easy to follow!

XXX


How I bleach my hair!

Posted by mickung

This has been very long awaited and I apologise!  I only do my roots once a month so I had to wait till I was next in need of a top up before I could take some pictures!

I always, always get questions asking what I use to bleach my hair, how I do it, who does it for me etc, so I hope this helps every body who is thinking about taking the leap and turning blonde!

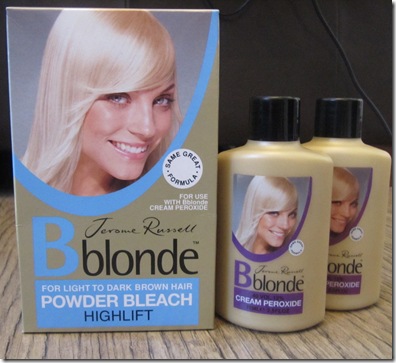
Here is what I use – Jerome Russell’s Bblonde powder and cream peroxide bleach!
hairbleach 099

You can get this from any local chemist, as well as Boots and Superdrug.  The pack of four sachets of powder bleach normally retails at around £5 and the individual cream peroxides retail at around £1.40

I used to use the 30% Vol Cream peroxide, but it went off the market for ages so I had to keep buying 40%, which is obviously stronger, but it makes my roots a tad whiter so I now generally use this more!

I have been peroxide blonde since the age of 16.  My friend and I went to a chemist and decided to ‘try something different’ and she transformed my mousy blonde hair into a blonde bombshell worthy barnet that evening in her bathroom!  She very kindly kept bleaching my roots every month until she moved to Spain two years ago, and ever since then my lovely Mother has taken on the dreaded role of bleaching my roots (Thanks Mummy!).  My mum is not a hair dresser, and I don’t believe you need to be to do this at home, you just need general knowledge and bravery to go for it and cover all the roots.

Here is my step by step guide!

YOU WILL NEED -

hairbleach 102

  • -3 latex or rubber gloves (two for the hands of your hair dresser, one for you for the itchy bleach!)
  • An old unused bowl
  • A hair bleach applicator (can usually be found in chemists for 50p!)
  • A hair clip
  • An old unused towel
  • Jerome Russel Bleach!

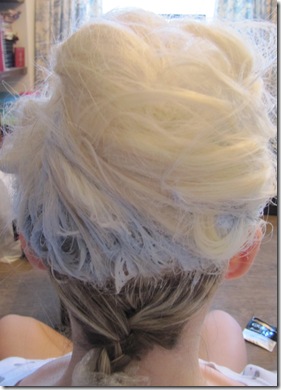
As I have the underneath layer of my hair brown (I decided to let my natural colour grow through as I haven't seen it in 5 years), I need to firstly separate the brown from the blonde.  So I use cling film and a hair band!

hairbleach 110 

My kind Mother separates the blonde from the brown, plaits it, then curls it up and wraps it in cling film so that the bleach can’t get to it.

HOW TO -

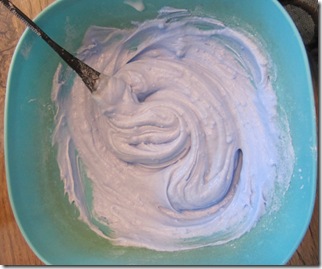
1) Mix powder sachet with cream peroxide bottle and stir until frothy and smooth.
hairbleach 112

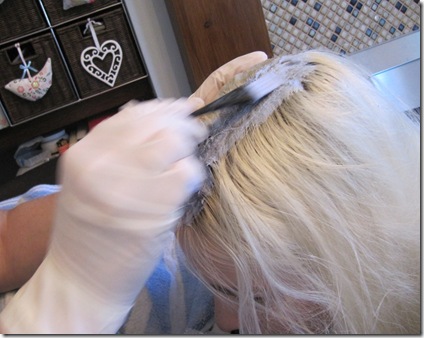
2) Slap it on the roots! (or whole hair if you are starting from scratch!)

hairbleach 114 

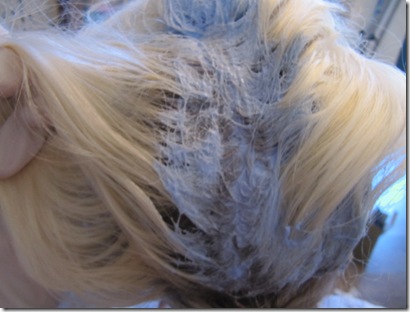
3) Keep going.  Lift sections of hair and paint the bleach on, and keep at it until the whole head of roots is covered!
hairbleach 118

hairbleach 127

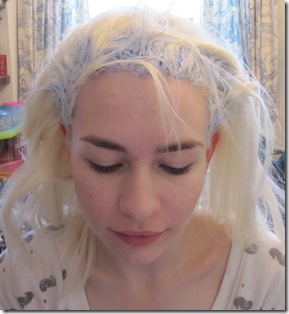
4) Once the whole head of hair is covered, clip up on the top of your head!
hairbleach 131

hairbleach 132

Okay, now for doing this for so long, I don’t really need to look at the time.  I know that it take approx 20-30 minutes for the product to be put on, and then I normally wait another excruciating 15-25minutes before I wash it off.  I will tell you now that this whole process SUCKS, because it itches like hell!!! The bleach is so aggravating, it feels like a hundred thousand tiny ants are moving around in your hair, itching and stinging you.  This is why I always wear a glove, so that I can itch when I need to.

I wash it off with an intense shampoo and conditioner for dry hair, normally something like Aussie.  I leave the conditioner in for at least 3 minutes after bleaching just to make my hair feel soft again. 

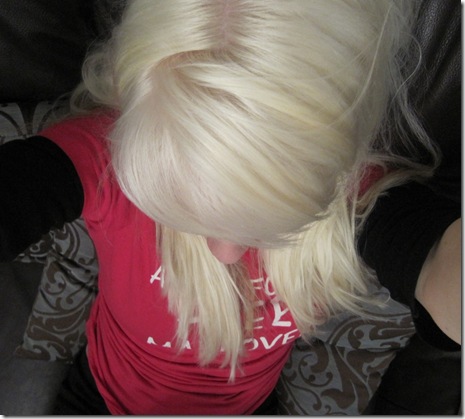
AND VOILA – I now have nice, bright white blond hair!
hairbleach 159

I am very lucky to have strong, healthy, thick hair naturally.  As long as I use a good conditioner every time I wash my hair, then it looks and feels healthy and soft.  However I know many people who have dry, brittle hair from bleaching, so I really suggest trying the bleach on a small patch of hair before you go right in and bleach your whole head.

When you first bleach your hair, you will probably need to use a toner.  Jerome Russell also has a hair toner in its range, which basically takes the ‘orange/yellow’ tint out of the bleached hair so that your blonde locks don’t look ginger in certain lights.  I don’t have to use this as my natural hair colour is blonde anyway, and holds onto the bleach pretty well, but I did use it when first going blonde.

I hope this helps any one who needs some advice on going blonde!  I adore being blonde and can’t imagine myself with any other hair colour.  I love how I can play around with exaggerated make-up looks because my hair colour allows it and it certainly gets a lot of attention. 

Has this helped anyone at all? If anyone needs any more advice or has any more questions then just let me know, send me a comment on this post!

P.S Sorry for the very unattractive, un-glamorous pictures in this post, keeping up the glamorous blonde locks unfortunately isn’t as pretty as it may seem!


A few FOTD & Beyonce Look!

Posted by mickung

I’m ILL!! I hate being ill, I have cold and flu symptoms and they just came out of nowhere!  Does anyone have any good tips for getting over colds quickly? I’ve already stocked up one Vit C tablets and hankys!

Lately I’ve been experimenting a bit with make-up and taking some some portraits!  I have some make-up skillz and photography skillz and I never use them together, so I thought why not!

This first look was inspired by Beyonce’s new video – (Why Don’t you Love me?) In which her make-up is gorgeous and she looks just stunning!

154 1 0155 1

mubb

eyez

eyez2

I used –

  • Gosh Kohl Black eyeliner
  • The Body Shop eye shadow in 45 & 01 Shimmer, Black liquid eye liner, White pencil liner, 05 blusher,
  • L’Oreal voluminous mascara & Infallible Long lasting foundation in Porcelain
  • UDPP
  • MAC’s Nylon & Beauty Marked eye shadow, and Patisserie lipstick!
  • Clinique dark brow pencil
  • Topshop cream blush in Neon Rose

And another – Not really inspired by anything this time -

20 1 IMG_0014_pp2

Used

  • MAC’s Nylon, Beauty Marked and Woodwinked eye shadow.  Ever Hip lipstick
  • The Body Shop – 12 Blusher, 02 gold shimmer eye shadow, Black liquid liner
  • L’oreal infallible foundation in Porcelain, voluminous mascara
  • Gosh kohl black eyeliner

What do you guys think? They are a bit random, its quite hard to take good pictures of yourself without seeing through the lens, but a tripod and zoom definitely helped!  X